1. Getting Started
1.1 Installation
RadiantQ jQuery Gantt add-in is supported in SharePoint Server 2016+ and SharePoint Online versions.
For SharePoint Online
Create a Add-in catalog in your SharePoint site by following this documentation
Then follow the steps in this documentation to deploy the App you received through e-mail or downloaded from our website.
For SharePoint Server 2016/2019
Follow this documentation to create an Add-in catalog and to add the app
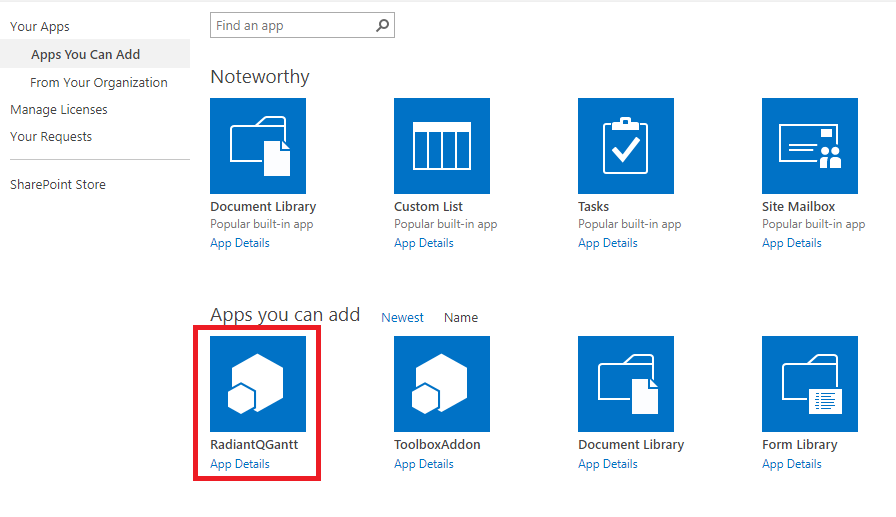
In the Final step you can choose an app from "Apps You Can Add" or "From Your Organisation" as below. Click on RadiantQGantt add-in to install it.
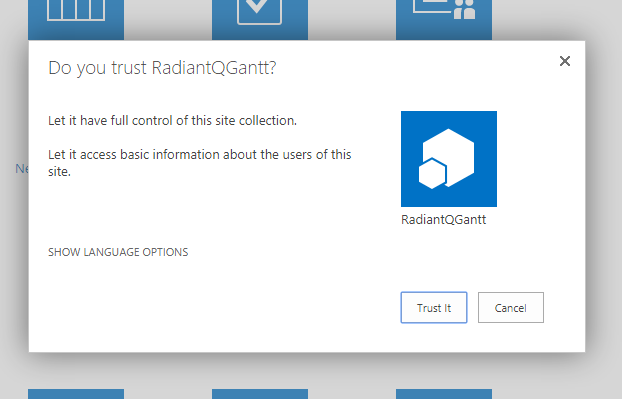
Once the add-in was installed, you will be asked for permission to allow the add-in to have full control over your site. Click ‘Trust it’ to continue
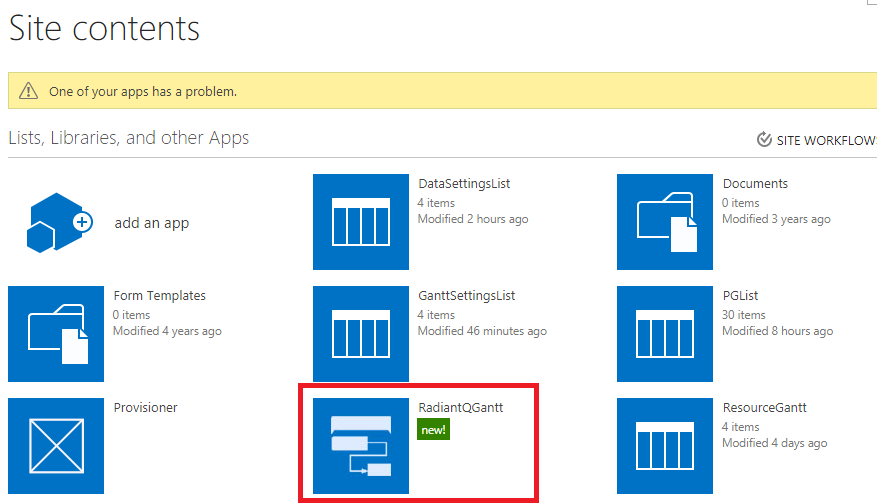
Finally, the app should be available here for you open:
1.2 Licensing
1.2.1 Obtaining License Key
Email the domain name like https://some-domain.sharepoint.com to us at sales@radiantq.com. This domain name should be the root WEB url for your SharePoint site.
We will reply back to you with your license key
1.2.2 Applying License Key in Add-on
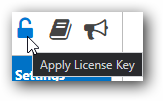
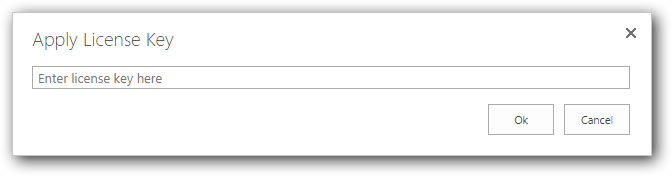
Click ‘Apply License Key’ button
Copy and paste the license key you have received in the ‘Apply License Key’ dialog. Then click ‘Ok’
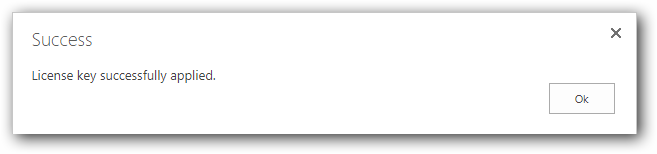
If the license key is valid, you will see the following dialog
| Panel | |
|---|---|
On this page:
|
2. Program Settings
Program Settings lets you use a single list with different binding configurations.

2.1 Create New Program
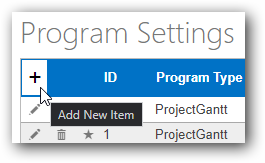
Click on ‘Add New Item’ button in ‘Program Settings’
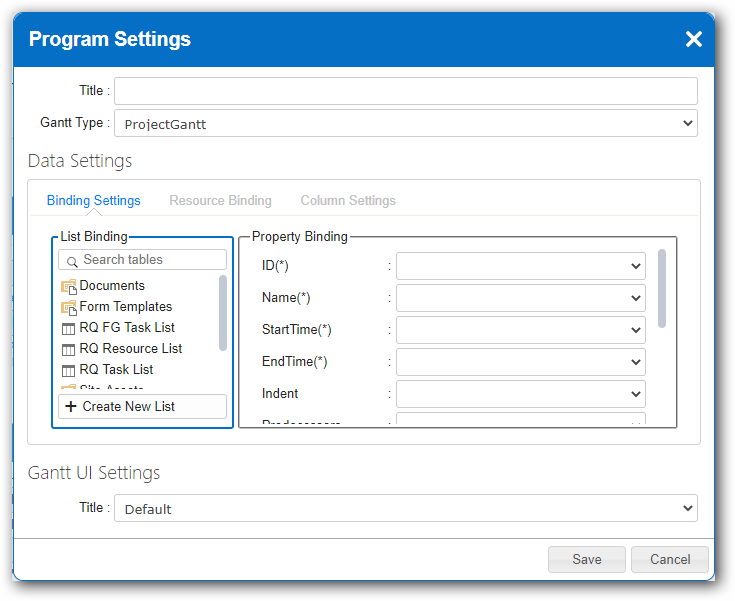
In the Program Settings dialog, enter the program name in ‘Title’.
| Note |
|---|
NOTE: Only alphanumeric characters are allowed in Title. No special characters/symbols allowed except Hyphen [ - ], Underscore [ _ ], Period [ . ] and Ampersand [ & ]. |
Select ‘Gantt Type’ you want.
| Info |
|---|
ProjectGantt is ideal for visualizing project-tasks. FlexyGantt is ideal for visualizing resource-utilization. Choose the one that suits your needs. |
The first section of settings is ‘Data Settings’ where you will specify the list and columns to use.
Depending on the type of Gantt you choose, you will be asked to bind one or two lists as data source.
If you choose ‘Project Gantt’…
‘Task Binding’ is mandatory and the list bound in this tab is used as main data source.
‘Resource Binding’ is optional. The list bound in this tab will be used as lookup source for ‘Assigned Resources’ column and as data source for ‘Resource Load View’ if it is enabled.
If you choose ‘FlexyGantt’ both ‘Resource Binding’ and ‘Task Biding’ is mandatory.
Select the tab to bind the list and columns for Resource / Task binding.
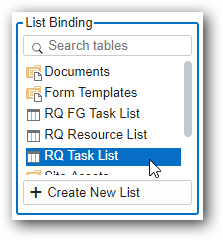
Then select the list you want to bind in ‘List Binding’ section.
After selecting the list to bind, you can select columns for binding in ‘Property Binding’ section. Supported column types for each property is shown in table below.
Binding | Property | Type | Is Required |
|---|---|---|---|
ProjectGantt | |||
Task Binding | ID | Counter | Yes |
Name | Single line of text / Multiple lines of text | Yes | |
StartTime | Date and time | Yes | |
EndTime | Date and time | Yes | |
Indent | Number | No | |
Predecessors | Single line of text / Multiple lines of text | No | |
Progress | Number | No | |
Assigned Resources | Single line of text / Multiple lines of text | No | |
Sort Order | Number | No | |
Preferred Start Time | Date and time | No | |
Resource Binding | ID | Counter | Yes |
Title | Single line of text / Multiple lines of text | Yes | |
FlexyGantt | |||
Resource Binding | ID | Counter | Yes |
Title | Single line of text / Multiple lines of text | Yes | |
ResourceName | Single line of text / Multiple lines of text | Yes | |
Task Binding | ID | Counter | Yes |
ResourceID | Number | Yes | |
TaskName | Single line of text / Multiple lines of text | Yes | |
StartTime | Date and time | Yes | |
EndTime | Date and time | Yes | |
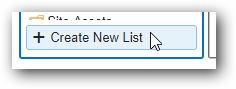
If you don’t already have a list with required columns and want to create a new one. You can use ‘Create New List’ button in ‘List Binding’ section to create a new list with required columns. It will also bind the properties automatically.
You can specify which columns you want to be visible in the Gantt table using Column Settings tab.
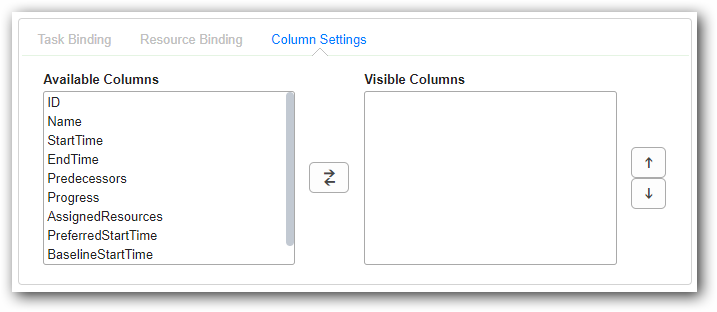
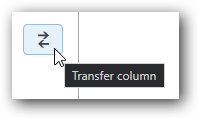
Select the columns you want and click ‘Transfer Column’ button to move from Available Columns to Visible Columns and vice-versa.
After setting up data settings, you can choose which Gantt UI Settings to use for that program using the dropdown. You can either use ‘Default’ Gantt UI Settings or custom Gantt UI Settings you have added in ‘Gantt UI Settings’.

To add a new Gantt UI Settings from within ‘Program Settings’ dialog select ‘Add new..’ item

2.2 Update, Remove & Organise Programs
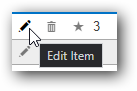
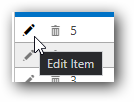
Click ‘Edit’ Button (Pencil Icon) of any program settings that you want to edit. Then, you can update any information of in the dialog.
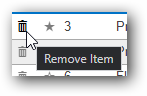
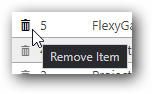
Click ‘Remove’ Button (Trash Icon) of a program settings to remove it from the list.
| Note |
|---|
NOTE: Items once deleted cannot be recovered. So make sure before you click Remove button. |
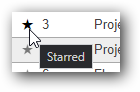
Click ‘Star' Button of a program to mark/unmark as starred item. Starred items will stay in top for easy access.
| Info |
|---|
NOTE: By default items are sorted by ID in descending order. This is same for starred items. |
3. Gantt UI Settings
Gantt UI Setting allows you to customize Gantt elements & options.

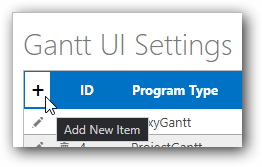
3.1 Creating Gantt UI Settings
Click on ‘Add New Item’ button in ‘Gantt UI Settings’
In the Gantt UI Settings dialog, enter the program name in ‘Title’.
| Note |
|---|
NOTE: Only alphanumeric characters are allowed in Title. No special characters/symbols allowed except Hyphen [ - ], Underscore [ _ ], Period [ . ] and Ampersand [ & ]. |
Select type of ‘Gantt Type’ you want.
| Info |
|---|
ProjectGantt is ideal for visualizing project-tasks. FlexyGantt is ideal for visualizing resource-utilization. Choose the one that suits your needs. |
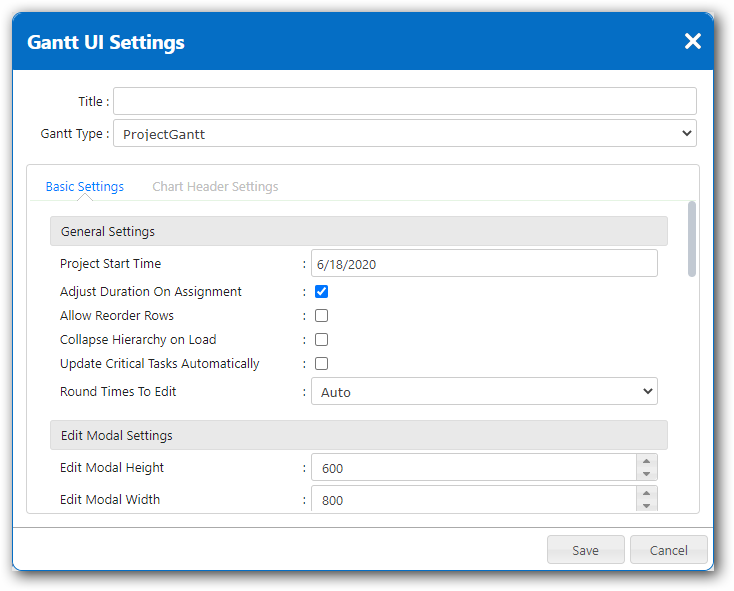
3.1.1 Basic Settings
3.1.1.1 Project Gantt
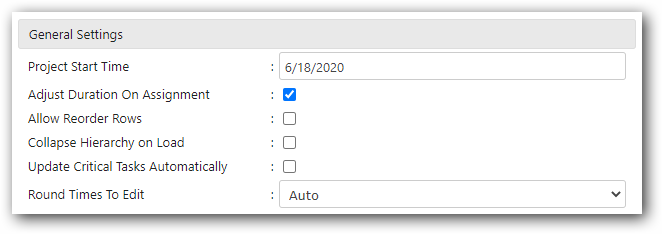
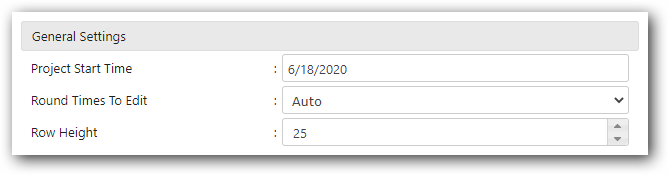
General Settings
Project Start Time - Start Time of project.
Adjust Duration On Assignment - Specifies whether the task's duration should automatically reduced to reflect the multiple assignments of resource.
Allow Reorder Rows - Specifies whether the user should be allowed to reorder rows by dragging them.
Collapse Hierarchy on Load - Specifies whether the parent tasks should be in collapsed mode when loading.
Update Critical Tasks Automatically - Specifies whether the critical tasks should be automatically updated.
Round Times To Edit - Rounding mode to use when resizing/dragging the taskbar.
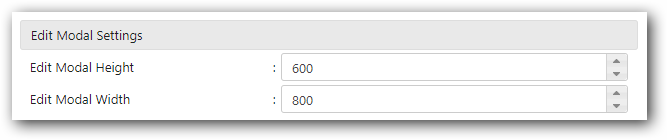
Edit Modal Settings
Edit Modal Height - Height of the edit modal dialog.
Edit Modal Width - Height of the edit modal width.
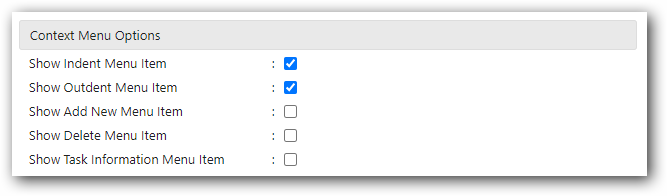
Context Menu Options
Show Indent Menu Item - Show ‘Indent’ menu in gantt table row context menu.
Show Outdent Menu Item - Show ‘Outdent’ menu in gantt table row context menu.
Show Add New Menu Item - Show ‘Add New’ menu in gantt table row context menu.
Show Delete Menu Item - Show ‘Delete’ menu in gantt table row context menu.
Show Task Information Menu Item - Show ‘Task Information’ menu in gantt table row context menu.
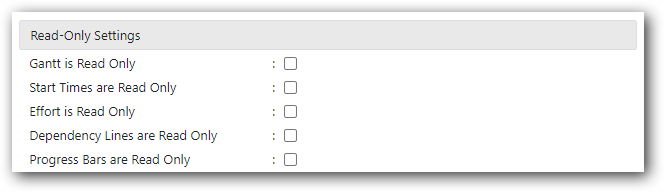
Read-Only Settings
Gantt is Read Only - Makes whole gantt control read only.
Start Times are Read Only - Makes start times read only.
Effort is Read Only - Makes the effort readonly
Dependency Lines are Read Only - Makes dependency lines read only.
Progress Bars are Read Only - Makes progress bars read only.
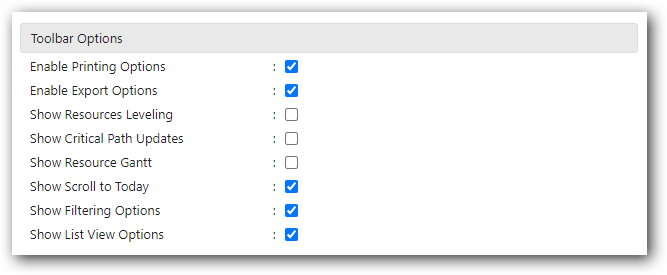
Toolbar Options
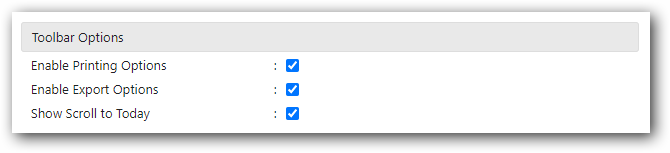
Enable Printing Options - Enables printing toolbar
Enable Export Options - Enables export options toolbar
Show Resources Leveling - Enables resource leveling option
Show Critical Path Updates - Enables toggle for critical paths option
Show Resource Gantt - Enables toggle for resource gantt
Show Scroll to Today - Enables scroll to today option
Show Filtering Options - Enables name, date & resource filtering options
Show List View Options - Enables custom list view option
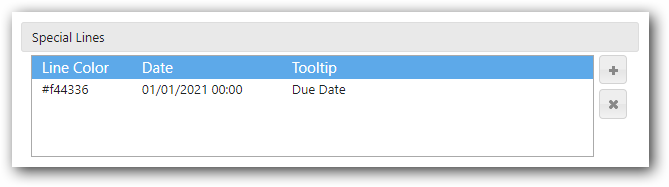
Special Lines
Special Lines are lines that can be drawn at specific times in the GanttChart to indicate milestones, deadlines or other times of interest.
Click ‘Add New Item’ button to create new special line
Then double click on the cells to edit their value
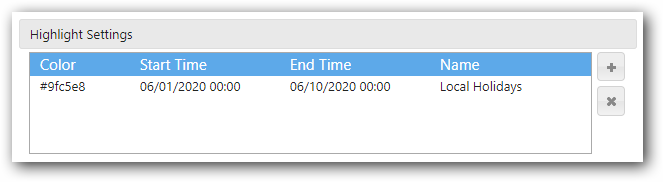
Highlight Settings
This option lets you to highlight a time range in the time line of chart area
Click ‘Add New Item’ button to create new special line
Then double click on the cells to edit their value
Work Time Schedule Settings
This option lets you to provide "working times" for the tasks in the project so that the time span of the tasks can be appropriately determined based on the required duration of the task.
Available work time schedules are…
Option_8by5 - 8hr/day for 5 days of week excluding weekends
Option_24by5 - 24hr/day for 5 days of week excluding weekends
Fulltime - 24hr/day for all 7 days of week
Custom - Lets you to choose custom timing and options for work time schedule
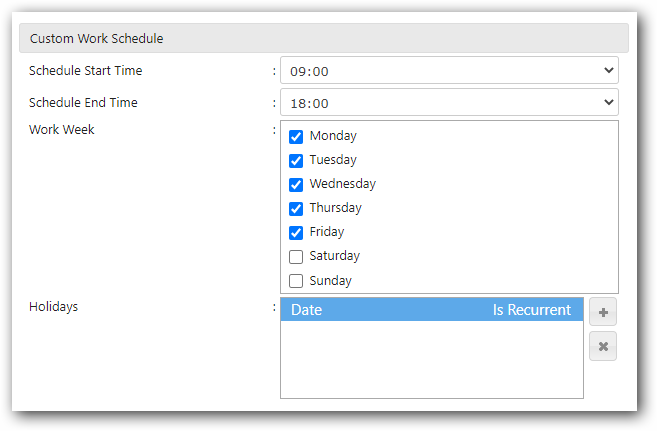
Custom Work Time Schedule
Specify start and end of working day
Then check the working days of week
If there is any holiday, add it to the holidays list

3.1.1.2 Flexy Gantt
General Settings
Project Start Time - Start Time of project.
Round Times To Edit - Rounding mode to use when resizing/dragging the taskbar.
Row Height - Specifies height for each row in gantt
Edit Modal Settings
Edit Modal Height - Height of the edit modal dialog.
Edit Modal Width - Height of the edit modal width.
Context Menu Options
Show Add New Menu Item - Show ‘Add New’ menu in gantt table row context menu.
Show Delete Menu Item - Show ‘Delete’ menu in gantt table row context menu.

Overlapped Tasks Behaviour
Shrink Height - If enabled overlapped tasks will shrink in height

Read-Only Settings
Gantt is Read Only - Makes whole gantt control read only.
Start Times are Read Only - Makes start times read only.

Toolbar Options
Enable Printing Options - Enables printing toolbar
Enable Export Options - Enables export options toolbar
Show Scroll to Today - Enables scroll to today option
Special Lines
Special Lines are lines that can be drawn at specific times in the GanttChart to indicate milestones, deadlines or other times of interest.
Click ‘Add New Item’ button to create new special line
Then double click on the cells to edit their value
Highlight Settings
This option lets you to highlight a time range in the time line of chart area
Click ‘Add New Item’ button to create new special line
Then double click on the cells to edit their value
Work Time Schedule Settings
This option lets you to provide "working times" for the tasks in the project so that the time span of the tasks can be appropriately determined based on the required duration of the task.
Available work time schedules are…
Option_8by5 - 8hr/day for 5 days of week excluding weekends
Option_24by5 - 24hr/day for 5 days of week excluding weekends
Fulltime - 24hr/day for all 7 days of week
Custom - Lets you to choose custom timing and options for work time schedule
Custom Work Time Schedule
Specify start and end of working day
Then check the working days of week
If there is any holiday, add it to the holidays list
3.1.2 Chart Header Settings
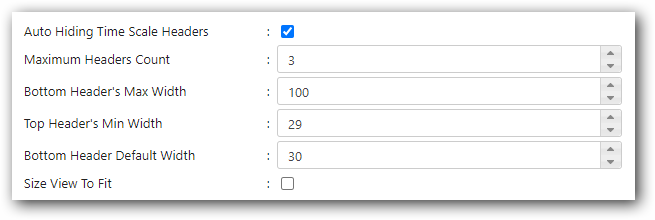
Auto Hiding Time Scale Headers - Automatically hides/shows selected timescale headers
Maximum Headers Count - Maximum numbers of headers to show at a time
Bottom Header's Max Width - Maximum width for bottom header
Top Header's Min Width - Minimum width for top header
Bottom Header Default Width - Default width for bottom header
Size View To Fit - Fix time scale headers to available width. Horizontal scrollbar in gantt chart will be hidden
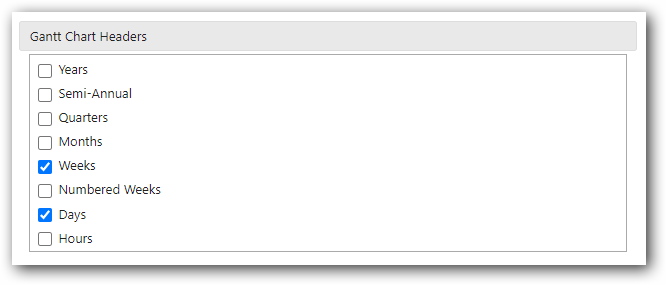
Gantt Chart Headers
The following gantt chart headers are available to use. Select the headers that are required for you. Gantt will determine which headers to show from the selection according to above said options
Years
Semi-Annual
Quarters
Months
Weeks
Numbered Weeks
Days
Hours
3.2 Updating/Removing Gantt UI Settings
Click ‘Edit’ Button (Pencil Icon) of the Gantt UI Settings that you want to edit. Then, you can update any information of in the dialog.
Click ‘Remove’ Button (Trash Icon) of a Gantt UI Settings to remove it from the list.
| Note |
|---|
NOTE: Items once deleted cannot be recovered. So make sure before you click Remove button. |
3.3 Using Gantt UI Settings
To use the Gantt UI Settings defined by the user, it must be selected in the Program Settings
Click add/edit button of a program
In the add/edit dialog the option to choose custom Gantt UI Settings is given at the bottom of the dialog.
Select the custom Gantt UI Settings you want to use with that program and click Save

| Info |
|---|
NOTE: Only the Gantt UI Settings of same type as Program Settings will be shown in the list. So make sure you have selected same Gantt Type in both the Program Settings & Gantt UI Settings |
3.4 Default Gantt UI Settings
The ‘Default’ Gantt UI Settings has the following configuration.
Settings | Value |
|---|---|
ProjectGantt | |
ProjectStartTime | Current Date |
AllowReorderRows | Yes |
CollapseHierarchyOnLoad | No |
RoundTimesToEdit | Auto |
EditModalHeight | 600 |
EditModalWidth | 800 |
ShowIndentMenuItem | Yes |
ShowOutdentMenuItem | Yes |
ShowAddNewMenuItem | Yes |
ShowDeleteMenuItem | Yes |
ShowTaskInformationMenuItem | Yes |
GanttReadOnly | No |
StartTimesReadOnly | No |
EffortReadOnly | No |
DependencyLinesReadOnly | No |
ProgressBarsReadOnly | No |
EnablePrintingOptions | Yes |
EnableExportOptions | Yes |
ShowResourcesLeveling | No |
ShowCriticalPathUpdates | No |
ShowScrollToToday | Yes |
ShowResourceGantt | No |
ShowFilteringOptions | Yes |
ShowListViewOptions | Yes |
ScheduleOption | FullTime |
AdjustDurationOnAssignment | Yes |
UpdateCriticalTasksAutomatically | No |
SpecialLines | None |
HighlightSettings | None |
AutoHideTimeScaleHeaders | Yes |
MaximumHeadersCount | 3 |
BottomHeaderMaxWidth | 100 |
TopHeaderMinWidth | 25 |
BottomHeaderDefaultWidth | 30 |
SizeViewToFit | No |
GanttChartHeaders | Years, Months, Days |
ScheduleStartTime | 9 |
ScheduleEndTime | 18 |
WorkWeekDays | Monday, Tuesday, Wednesday, Thursday, Friday |
Holidays | None |
FlexyGantt | |
ProjectStartTime | Current Date |
RoundTimesToEdit | Auto |
RowHeight | 25 |
EditModalHeight | 600 |
EditModalWidth | 800 |
ShowAddNewMenuItem | Yes |
ShowDeleteMenuItem | Yes |
ShrinkHeight | Yes |
GanttReadOnly | No |
StartTimesReadOnly | No |
EnablePrintingOptions | Yes |
EnableExportOptions | Yes |
ShowScrollToToday | Yes |
ScheduleOption | FullTime |
SpecialLines | None |
HighlightSettings | None |
AutoHideTimeScaleHeaders | Yes |
MaximumHeadersCount | 3 |
BottomHeaderMaxWidth | 100 |
TopHeaderMinWidth | 25 |
BottomHeaderDefaultWidth | 30 |
SizeViewToFit | No |
GanttChartHeaders | Years, Months, Days |
ScheduleStartTime | 9 |
ScheduleEndTime | 18 |
WorkWeekDays | Monday, Tuesday, Wednesday, Thursday, Friday |
Holidays | None |